Het aanleggen van een moestuin in containers verschilt niet veel van het aanleggen van uw in de grond gelegen moestuin of moestuin. Dezelfde seizoensvereisten zijn van toepassing:plant gewassen voor het koele seizoen in het vroege voorjaar of de late zomer; plant gewassen voor het warme seizoen in de lente en de zomer.
Omdat de ruimte in uw containertuin beperkt is in omvang (inclusief de diepte van de grond voor wortelgroei), selecteert u eerst een container die groot genoeg is voor het gewas dat u wilt laten groeien en kiest u vervolgens gewasvariëteiten of cultivars die goed in containers groeien. Je zult succes hebben met groenten die worden omschreven als ‘compact’, ‘struik’ of ‘dwerg’.
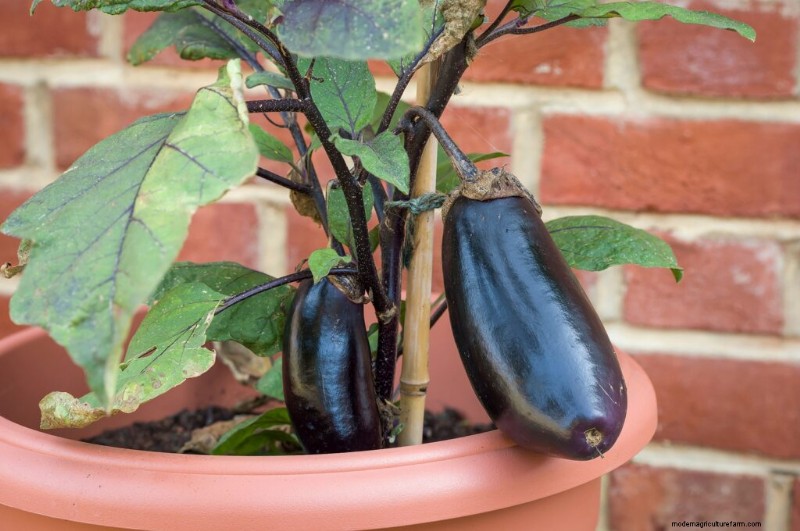
Aubergine kweken in een plastic pot
De voordelen van containertuinieren
- Het enige wat u nodig heeft om te beginnen is een troffel, voorgemengde grond en een container.
- Verzorging is eenvoudiger:containertuinen krijgen zelden onkruid; zieke grond wordt gemakkelijk weggegooid; water is bijna altijd dichtbij, aangezien de meeste containertuinen zich op patio's, veranda's of balkons bevinden
- Containers zijn mobiel:u kunt profiteren van zon- en seizoensveranderingen; planten zijn gemakkelijker beschut tegen de kou.
- De oogst is snel:plaats uw containers in de buurt van de keuken.
- Bijna elke plant die in uw tuin in de grond groeit, zal in uw containertuin groeien, op voorwaarde dat de container groot genoeg is.
Omdat containertuinen zoveel vrijheid bieden, kunt u het avontuur vergroten door gastronomische variëteiten te kweken die u niet vaak op de boerderijmarkt of in de groentewinkel tegenkomt. Hier zijn een paar suggesties:erwten (rond, dik en knapperig), Mizuna (slablaadjes met stroken), winterpostelein (kleine, sappige blaadjes); salade burnet (groene salade smaakt naar komkommer), kruidenbasilicum (smaakt naar de naam), knoflookbieslook (op aardappelen of in salsa), tuinbonen (probeer ze vers), bieten (wat dacht je van roodgewerveld), paarse tomatillos (genoeg gezegd), miniatuur paprika's (probeer Jingle Bells).
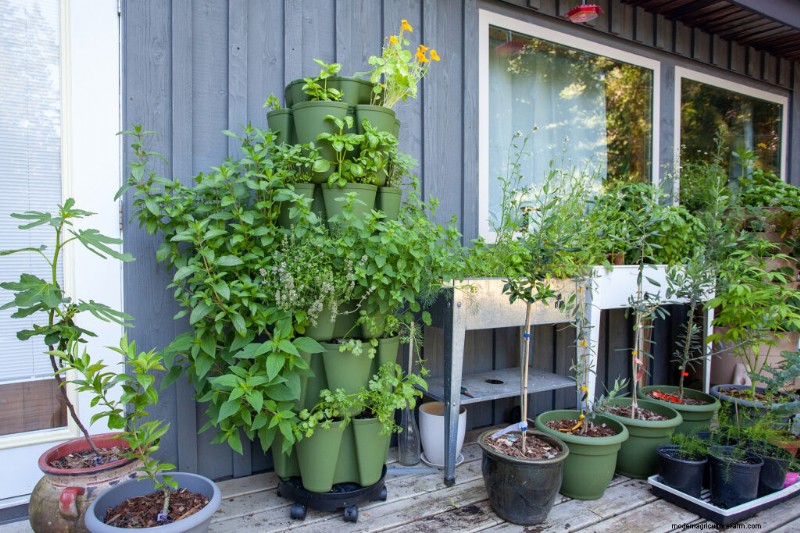
Kweken in verticale torens en potten op een dek
Bekijk de zaadcatalogi; de meeste zullen variëteiten aanbevelen voor de containerteelt. Hier is een lijst met groente- en kruidenvariëteiten en cultivars voor de moestuin die u kunt proberen, en een minimale containergrootte wordt voorgesteld voor het kweken van één plant. Als je meer dan één plant in een container wilt kweken, tel dan nog eens driekwart van de breedte van de container op.
Je kunt een miniatuurmoestuin laten groeien. Het kweken van groenten in containers is een gemakkelijke en plezierige manier van tuinieren als je in een appartement, herenhuis of condominium woont. Een zonnig balkon, terras, binnenplaats, veranda, deuropening of vensterbank is alles wat u nodig heeft om uw kleine tuin te laten groeien. De meeste groenten en kruiden zullen slagen in containers. Sterker nog, uw vermogen om een container van de schaduw naar de zon en van een koude naar een warme locatie te verplaatsen, is vrijwel verzekerd van succes.
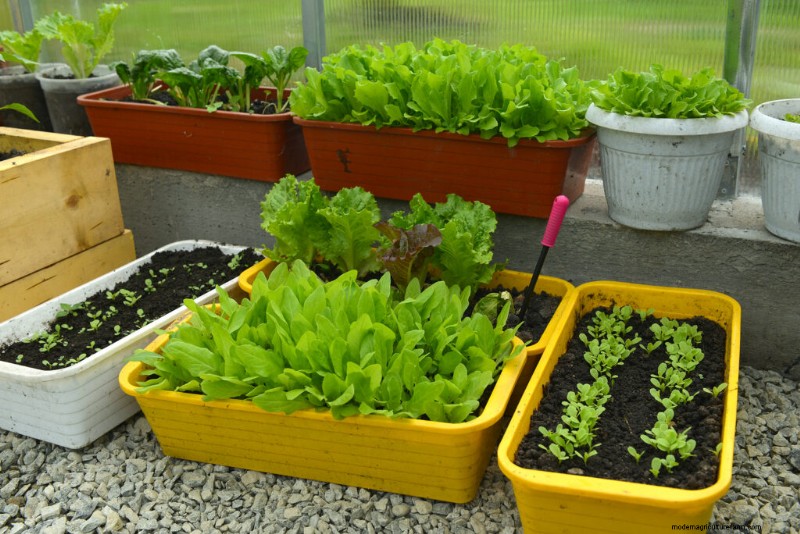
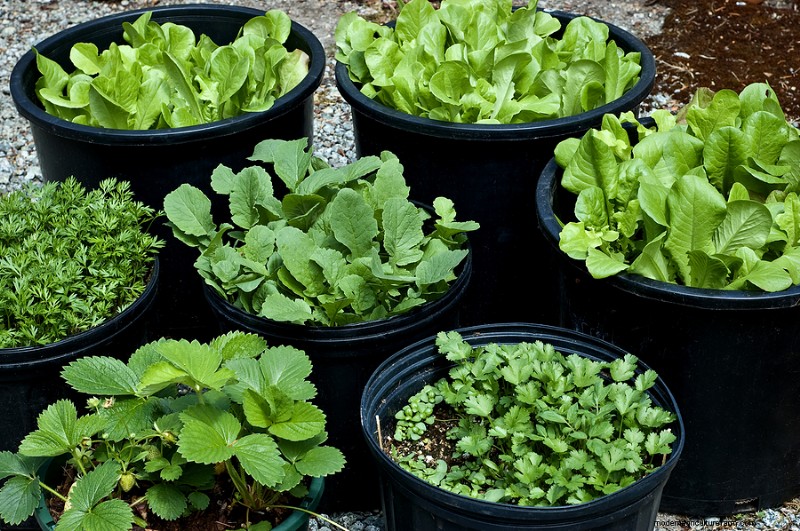
Dozen en potten met sla en spruitjes
Een container kiezen
Containers kunnen bijna alles zijn wat u maar wilt:plastic of kleipotten, plastic of houten bloembakken (redwood of cederhout zijn duurzaam en verslechteren langzaam), kuipen, schepel- of draadmanden, of tonnen. Ik heb zelfs groenten zien groeien in oude gieters en tuinlaarzen. Je kunt improviseren met allerlei soorten containers, afhankelijk van welke groenten je wilt laten groeien.
Container Garden-producten bij Amazon:
- Gardzen kweekzakken van 10 gallon, 10 gallon
- Verhoogd bed op wielen voor groenten
- Zelfwatergevende plantenbakken voor groenten
- Captain Jack's Dead Bug Brew
- Harris Neemolie Plantenziektebestrijding
Plastic potten zijn lichtgewicht en meestal goedkoop. Gegoten polypropyleen is populair, veel ervan hebben de uitstraling van een aarden pot. (Deze isoleren de grond beter tegen kou dan dun plastic.) Klei- en terracottapotten zijn duurder maar zeer aantrekkelijk. Klei en terracotta hebben vaker water nodig als er geen plastic voering wordt gebruikt. Geglazuurde potten zijn ook aantrekkelijk, maar controleer nogmaals of ze afvoergaten hebben. Houten kisten, kuipen en halve vaten zijn een goede keuze als het vriest. Zorg ervoor dat houten containers drainagegaten hebben en laat ze, als ze eenmaal zijn geplant, niet uitdrogen, anders zullen ze barsten of hun vorm verliezen.

Kooltjes groeien in een plastic plantenbak
Soorten containers
Containers voor containertuinen kunnen van terracotta, hout, plastic of metaal zijn. Kies de stijl die het beste bij uw terras, balkon of dakterras past.
Hoe groter de container, hoe minder water en voeding nodig zal zijn, omdat grotere containers meer grond of potmedium, vocht en voedingsstoffen kunnen bevatten die planten nodig hebben. Kleine potten en bloembakken zullen waarschijnlijk elke dag water nodig hebben in warme en hete streken. Grote potten kunnen doorgaans drie of meer dagen bodemvocht vasthouden.
Met containers op wielen kunt u planten verplaatsen om de beste zon te krijgen of om te profiteren van de schaduw bij warm weer. Plantcaddies zijn er in verschillende stijlen, met wielen en zwenkwielen die geschikt zijn voor het gewicht dat ze kunnen dragen.
Goede drainage is essentieel bij het kweken van planten in containers. Containers met een diameter kleiner dan 10 inch/25 cm moeten een gat met een diameter van ½ inch/1,2 cm hebben voor een goede afvoer. Containers met een diameter groter dan 25 cm hebben twee tot vier gaten nodig.
Een bodemdiepte van minimaal 20 cm bevat voldoende grond, voedingsstoffen en vocht om een goede opbrengst te garanderen van bijna elke groente en kruiden die in een container groeien. (Verwacht dat je twee of drie keer per week water geeft.) Kleinere containers met minder aarde vereisen mogelijk vaker water en bemesting.
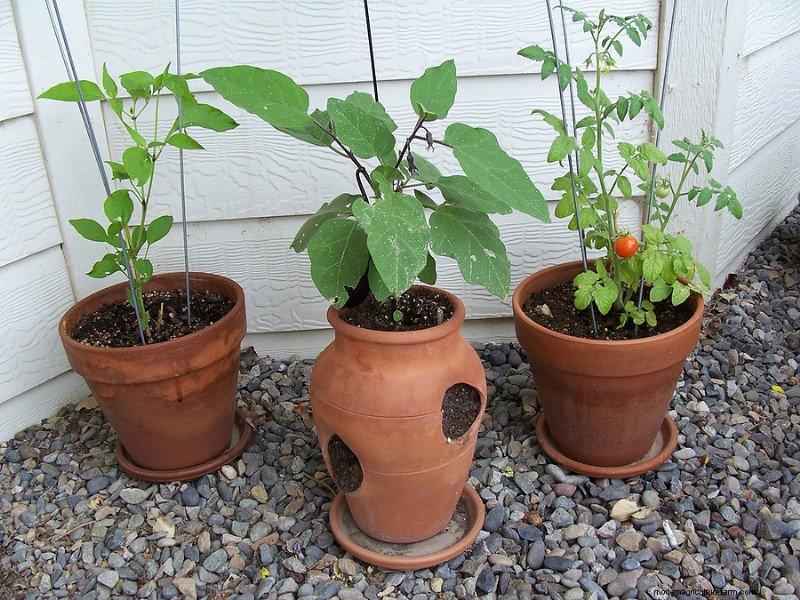
Peper-, aubergine- en tomatenteelt in terracottapotten
Over het algemeen zal uniformiteit in het uiterlijk en het materiaal van een container visueel aantrekkelijk zijn.
- Terracotta en geglazuurde potten en plantenbakken zijn beproefd en hebben een klassieke uitstraling. Terracotta is poreus en onttrekt vocht aan de grond. Geglazuurde potten houden vocht langer vast. Klei- en geglazuurde potten kunnen zwaar zijn en na het planten moeilijk te verplaatsen zijn zonder te breken. Een plantenwagen kan u helpen deze containers te verplaatsen.
- Houten kisten en halve vaten hebben een rustieke uitstraling. Redwood- en cedercontainers zijn bestand tegen vocht en rotten langzaam – gedurende meerdere jaren. Houten containers kunnen vocht afvoeren, dus u moet opletten dat u water geeft. Als u een plastic folie in uw houten container plaatst, wordt de verdamping vertraagd en wordt het hout beschermd.
- Gegalvaniseerd staal heeft een moderne uitstraling en is bestand tegen corrosie. Metalen emmers en troggen vind je bij diervoederwinkels en bouwmarkten. Metalen potten houden water goed vast, maar warmen ook snel op als ze worden blootgesteld aan direct zonlicht. Bekleed metalen containers met plastic of landschapsstof om te voorkomen dat het metaal de grond oververhit.
- Potten van glasvezel en hars en plantenbakken zijn licht van gewicht en worden vaak vervaardigd om eruit te zien als zwaarder terracotta of keramiek.
- Plastic potten – van de meest kleurrijke tot eenvoudige zwarte kwekerijpotten – zijn het minst duur, lichtgewicht en duurzaam, en zijn er in vele maten. Plastic potten zijn ideaal als containers vaak verplaatst moeten worden. Plastic containers houden vocht vast en vereisen minder water. In koude wintergebieden kun je plastic dubbelpotten met een laag veenmos of krantenpapier tussen de potten om voor isolatie te zorgen. In warme zomerstreken kun je de buitenkant van zwarte plastic potten beschilderen met latex om de hitte van de zon te reflecteren.
- Vezelpotten – papier geïmpregneerd met bindmiddelen – zijn sterk, duurzaam, licht van gewicht en zeer goedkoop. Vezelcontainers moeten goed gedraineerd zijn en mogen niet in schotels met water staan.
- Zelfwatergevende containers –plantenbakken met ingebouwde reservoirs zijn een goede keuze voor dak- of balkontuinen. Zelfwatergevende containers hebben een bovenste gedeelte voor aarde en een onderste reservoir voor water met een afvoersysteem om het water naar de grond te brengen. Deze containers maken het dagelijks water geven overbodig en zijn zeer geschikt voor dorstige gewassen zoals tomaten, aubergines, paprika's en pompoenen.
- Vensterbakken zijn een goede keuze als de ruimte beperkt en smal is. Houten, terracotta en plastic bloembakken zijn gemakkelijk te vinden. Voor bloembakken zijn beugelsets nodig om ze veilig aan dorpels en balkons te bevestigen.
- Hangmanden kan u helpen al uw verticale ruimte te benutten. Halve manden passen tegen muren. Kies haken en beugels die geschikt zijn voor het gewicht van de beplante en bewaterde hangmand. Houd er rekening mee dat hangmanden vanwege hun blootstelling aan wind en zon over het algemeen snel uitdrogen.
- Groeizakken zijn lichtgewicht, flexibele stoffen tassen die in vrijwel elke ruimte passen. Kweekzakken zijn meestal bekleed met plastic en houden vocht vast. Eenmaal leeg zijn ze gemakkelijk te verplaatsen en op te bergen. De zijkanten van de zak kunnen op en neer worden gerold voor verschillende hoeveelheden aarde, afhankelijk van het gewas dat je kweekt.
- containers met brede bodem en troggen zijn goede keuzes voor balkons en daktuinen, omdat ze een laag zwaartepunt hebben en minder snel omver geblazen of door de wind rondgeslingerd worden.
- Lichtgewicht mini-hoogslaper kan worden gebruikt op patio's, balkons en dakterrassen. Ze vereisen een onderlaag van landschapsweefsel om grond en vocht van het oppervlak te houden en moeten worden geplaatst voor optimale drainage.
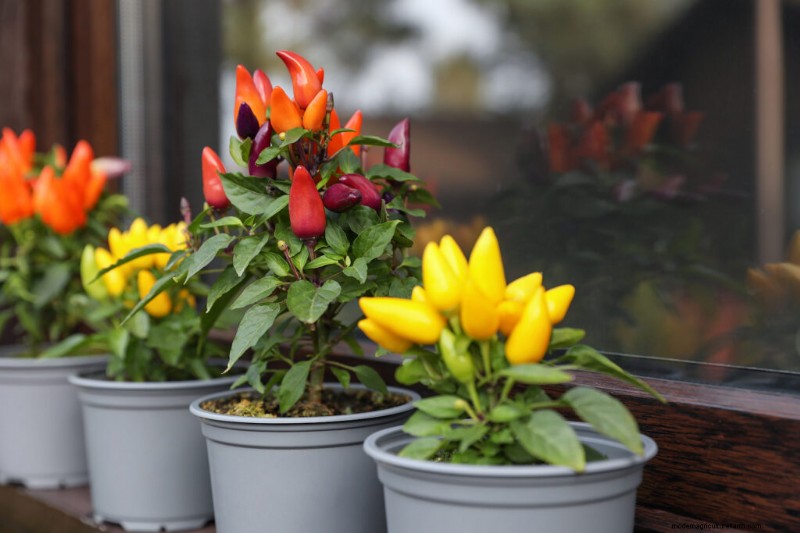
Paprika's groeien in plastic potten van 3 gallon
Containerformaten
De beste keuze is om een zo groot mogelijke container te kiezen. Bonen, komkommers, groene paprika's en tomaten hebben containers van vijf gallon nodig (dwergvariëteiten kunnen rondkomen in potten van twee gallon). Radijsjes, sla, lente-uitjes, tuinkers, peterselie, wortels, bieslook en andere kruiden gedijen in een bakje van vijftien centimeter diep en ongeveer vijftien centimeter breed. Een enkele kleine groente zoals sla of spinazie groeit in een pot van 15 cm. Een 12-inch pot biedt plaats aan vier sla- of spinazieplanten. In een pot van 18 inch passen maar liefst tien kruiden. Vermijd ondiepe containers die de wortels verkrampen en snel kunnen uitdrogen of doordrenkt kunnen raken. Perforeer de bodem van elke container, zodat overtollig water wegloopt. Als u een container gebruikt die al eerder is gebruikt, zorg er dan voor dat u deze grondig wast voordat u gaat planten.
Bladgewassen in kleine containers
Bodemmix voor containers
Het kopen van voorgemengde potgrond is de gemakkelijkste manier om uw container te vullen. Potgrondmixen in zakken zijn er in verschillende maten. Tuincentra en de meeste bouwmarkten verkopen potmixen, meestal multifunctionele grond of compost. Als je goede kweekgrond in je tuin hebt, kun je die gebruiken:voeg gelijke delen oude compost, verpulverde bovengrond en een combinatie van wormenmest, koffiedik en perliet toe om je eigen mix te maken. (De grond uit de tuin alleen is bijna altijd te dicht voor de teelt van containerplanten.)
Plaats een laag turf of gesteriliseerde schors op de bodem van de container, over het afvoergat, om te voorkomen dat uw potgrond wegspoelt. Voeg vervolgens een laag compost toe en vervolgens de potmix. Plaats grote containers, zoals kuipen en halve tonnen, op hun definitieve plaats voordat u ze met aarde vult. Als u van plan bent om gedurende het jaar grote containers te verplaatsen, plaats ze dan op wielen of rollen. Vul de container tot op 2,5 cm van de bovenkant.
De bodem levert voedingsstoffen en water aan de wortels van planten en verankert planten op hun plaats. Omdat het plantmedium in containers beperkt is, is de samenstelling ervan erg belangrijk voor de planten die daar groeien.
Een containerplantmix moet rijk aan voedingsstoffen zijn en meerdere dagen vocht vasthouden. Het moet zacht en brokkelig zijn en bestand zijn tegen verdichting, zodat de wortels zich goed kunnen ontwikkelen. Een potgrond moet vrij zijn van in de bodem aanwezige schimmels en roofplagen zoals larven, snijwormen en larven die planten kunnen vernietigen.
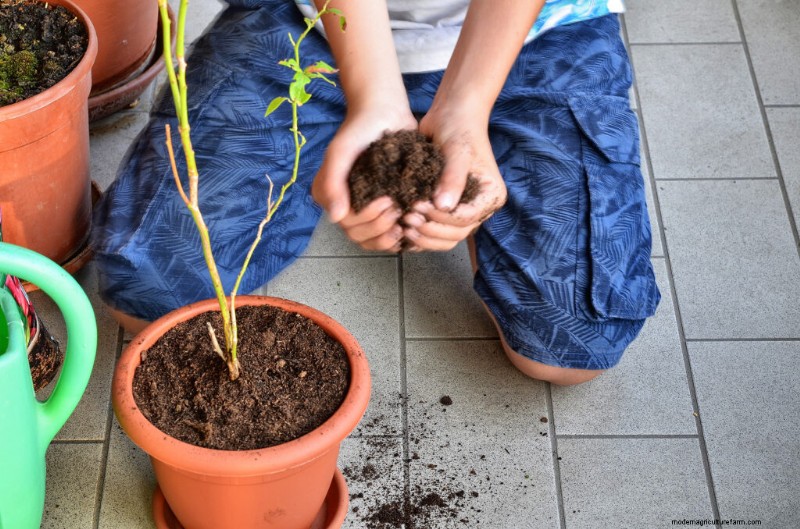
Het toevoegen van aarde aan een pot voor een bosbes
Meestal is achtertuingrond niet geschikt voor het planten van containers. Hoewel de bodem in de achtertuin vruchtbaar kan zijn, bevat deze vaak te veel klei of te veel zand, of kan deze te zuur of te alkalisch zijn. Dergelijke concentraties in de beperkte ruimte van een container kunnen schadelijk zijn voor de plantengroei.
Om een gezonde plantontwikkeling te garanderen, kun je het beste een plantmix voor de containerteelt kopen of je eigen mix maken. Er zijn veel merkpotmixen verkrijgbaar bij tuincentra en kwekerijen. Vraag uw verzorger wat zij aanbeveelt. Twee commerciële lichtmixen die geschikt zijn voor balkon- en daktuinen zijn Supersoil en Jiffy Mix. Andere commerciële potmixen zijn Pro Mix en Redi-earth.
Het mengen van uw eigen potmix is een alternatief voor het kopen van kant-en-klare mixen. Zelf mengen kan kosteneffectief zijn als je een grote hoeveelheid potgrond nodig hebt en als je een plek hebt om deze op te slaan.
Hier zijn drie potmixen die je thuis kunt mengen:
Cornell University oppotmix:
Hier is een potmix ontwikkeld door Cornell University (deze formule is voldoende mix voor ongeveer drie tot vier containers van 4 liter):
- 8 liter (7,5 liter) vermiculiet
- 8 liter (7,5 liter) versnipperd veenmos (let op:veenmos is een niet-hernieuwbare hulpbron; vervang oude compost)
- 2 afgestreken eetlepels superfosfaat
- 2 eetlepels kalksteen
- 8 eetlepels gestoomd beendermeel of gedroogde koeienmest
Meng alle ingrediënten in een prullenbak bekleed met een blikvoering. Schud krachtig. Dit is een geurloze mix en wat je niet gebruikt kun je in plastic zakjes bewaren.
De oppotmix van de Universiteit van Californië:
Hier is een potmix ontwikkeld door de Universiteit van Californië (deze formule maakt één kubieke meter of 27 kubieke voet (0,76 cm) plantmix, wat gelijk is aan 202 gallon (765 liter)):
- 13 kubieke voet (0,36 kubieke meter) gecomposteerd redwood-zaagsel
- 7 kubieke voet (0,2 kubieke meter) gemalen sparren- of pijnboomschors
- 3½ kubieke voet grof veenmos (let op:veenmos is een niet-hernieuwbare hulpbron; vervang oude compost)
- 3½ kubieke voet tuinbouwzand of scherp bouwzand
- Voeg aan 1 kubieke meter (0,02 cbm) van deze ingrediënten toe:
- 5 pond (2,2 kg) dolomietzand
- 2 pond (0,9 kg) superfosfaatmeststof
- 1 pond (0,45 kg) calciumnitraat
Zelfgemaakte groentepotmix:
Deze mix is voldoende voor één container van 38 liter (voor grotere batches dient u de ingrediënten proportioneel te verhogen):
- 19 liter volledig rijpe compost (commercieel bereid of zelfgemaakt)
- 4 liter scherp zand
- 4 liter vermiculiet of perliet
- 1 gallon (4 liter) gemalen veenmos
Meng deze ingrediënten en voeg vervolgens 236 ml 5-10-10 chelaatmeststof toe en meng opnieuw.
Commercieel gemengde potmixen komen gesteriliseerd naar u toe. De huismengsels die tuinaarde of zelfgemaakte compost bevatten, zijn dat niet. Mogelijk wilt u uw mix steriliseren om onkruidzaden en nematoden (kleine microscopisch kleine wormen) te vernietigen en schimmelziekten te neutraliseren. Je kunt je mix steriliseren door het in een ondiepe pan uit te spreiden en het een uur lang op 135 °C (275 ° F) te bakken; laat de grond weken voordat u gaat bakken om geurtjes te voorkomen.
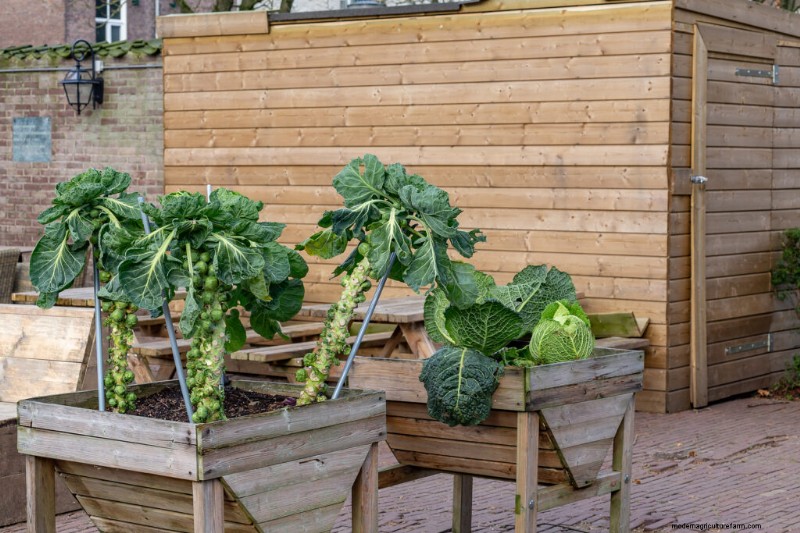
spruitjes en groene kool groeien in houten kisten
Crops voor containers
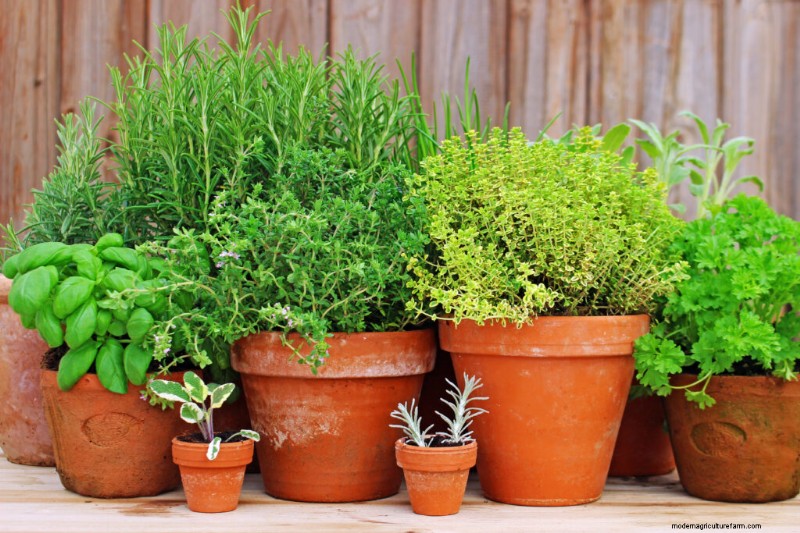
Kies compacte, dwerg- of snelrijpe groenten voor uw containertuin. Bladgroenten zoals sla, spinazie, snijbiet, groene uien en kool kunnen gedijen met slechts vijf uur zon per dag. Wortelgroenten zoals radijs, wortelen en bieten hebben nog een uur of twee nodig. Vruchtgroenten hebben de meeste zon en warmte nodig; komkommers, aubergines, paprika's en tomaten hebben elke dag minimaal 8 uur volle zon nodig. Hetzelfde geldt voor bonen. Tomaten, paprika's en koolplanten worden vooral aanbevolen aan de beginner. Kruiden zijn gemakkelijk te kweken in containers:probeer bieslook, peterselie, basilicum, dille, rozemarijn, salie, bonenkruid, dragon en zoete marjolein.
Seeds voor succes bij Amazon:
- 55 erfstukgroentezaadvariëteiten
- 32 Variantenpakket Survival Gear Voedselzaden | Niet-GMO
- Startpakket voor zaden met 60 cellen en kweeklampen
- Duurzame waterdichte zaailing-warmtemat
Zoek naar groenten die specifiek worden aanbevolen voor tuinieren in containers. Dit zijn compacte of dwerggroentevariëteiten zoals Little Ball-bieten, Short 'n Sweet- en Little Finger-wortelen, Tom Thumb- en Salad Bowl-sla en Tiny Tim- of Pixie-tomaten.
Tuinieren in containers is een goede manier om verticaal tuinieren te beoefenen. Komkommers, bonen, erwten en tomaten kunnen op een latwerk worden getraind. Plaats het latwerk in uw container voordat u het met aarde en planten vult. Kies een grotere container met een brede bodem om te voorkomen dat de wijnstokken omvallen als ze volwassen zijn.
Groentevariëteiten om in containers te kweken
Namen van groentevariëteiten worden gevolgd door voorgestelde containerformaten.
- Artisjok :Green Globe, Imperial Star, Violetto; container 24″ diep.
- Limabonen: Bush Baby, Bush Lima, Fordhook, Fordhook 242; container 12″ breed x 8-10″ diep.
- Snapbonen: Bush Blue Lake, Bush Romano, Contender, Provider, Rushmore, Tendercrop Stringless; container 1′ breed x 1′ diep.
- Bieten: Baby Canning, Burpee Golden, Little Ball, Red Ace Hybrid, Ruby Queen; container 6″ breed x 6-12″ diep.
- Broccoli: Arcadia, groene komeet, Munchkin, klein wonder; container 8-12″ breed x 20″ diep.
- Brusselse spruitjes: Jade Kruis, Oliver, Rubine; container 12″ breed x 18-20″ diep.
- Kool: Babyhoofd, Dwerg Morden, Earliball, Snelle bal, Flitser, Minicole; container 8-12″ breed x 1′ diep.
- Wortelen: Amini, Baby Fingers Nantes, Baby Spike, Beste van het stel, Danver’s Half Long, Early Horn, Gold Nugget, Kinko, Nantes Half Long, Pink, Round Baby, Short &Sweet, Thumbelina, Tiny Sweet; container 10″ breed x 10″ diep.
- Bloemkool: Sneeuwkruis, Violette Koningin; container 18″ breed x 2-3′ diep.
- Selderij: Conquistador, Vroege Sneeuwbal, Redventure, Ventura; container 8-10″ breed x 10″ diep.
- Snijbiet: Felle lichten, Fordhook, Fordhook Giant, Lucullus, Robijnrood; container 12-18″ breed x 1′ diep.
- Chinese kool: Bok Choy, Michihli, Wong Bok; container 1′ breed x 20″ diep.
- Collards:elke variëteit; container 12″ diep.
- Maïs:FM Cross, Golden Bantam, Kandy Korn, Luther Hill, Precocious; container 3′ breed x 1′ diep; 3 per container om bestuiving te garanderen.
- Cress: Krullende tuinkers, hooglandkers; container 8″ breed x 6-8″ diep.
- Komkommer: Burpee Hybrid II, Burpee Pickler, Bush Baby, Bush Champion, Bush Crop, Bush Pickle, Fanfare, Patio Pik, Pickalot, Picklebush, Pot Luck, Salad Bush, Spacemaster. Beitsen:Lucky Strike; container 1′ breed x 16″ diep.
- Eetbare bloemen: Bachelor's Button, Calendula, Dianthus, Goudsbloem, Oost-Indische kers, Zonnebloem, Altviolen; houder
- Aubergine: Bambino, Black Beauty, Dusky, Easter Egg, Florida Market, Long Tom, Millionaire, Morden Midget; container 16″ diep x 18″ diep.
- Andijvie: Bianca Riccia, Nataly, Neos; container 8-10″ diep.
- Kruiden: Basilicum, Bernagie, Kamille, Bieslook, Koriander, Dille, Venkel, Hysop, Citroengras, Citroenverbena, Marjolein, Munt, Oregano, Rozemarijn, Salie, Bonenkruid, Shiso, Dragon, Tijm; container 8-10″ diep.
- Mierikswortel: Maliner Kren; container 5-gallon kuip – 3′ diep.
- Boerenkool :Elke variëteit; container 8″ breed x 8″ diep.
- Koolrabi: Groothertog; container 12″ diep.
- Prei: Koning Richard, Lincoln; container 10-12″ diep.
- Sla: Zwartgezaaide Simpson, Buttercrunch, Cos, Green Ice, Green Looseleaf, Little Gem, Mignonette, Oakleaf Red Sails, Red Fire, Red Looseleaf, Slakom, Tom Thumb; container 8″ breed x 6-8″ diep.
- Mosterd: Groene Golf, Osaka Paars, Rode Reus; container 8-12″ diep.
- Ui: Soorten bosjes:Beltsville bosje, Crystal Wad Pickling, Japans bosje, Wit bosje, Witte peer. Normen:Copra, Early Yellow Globe, South Redport; container 10-12″ diep.
- Peterselie: Donker Mos Gekruld, Paramount; container 8″ diep.
- Erwten: Burpee's Blue Bantam, Early Patio, Laxton's Progress, Little Marvel, Melting Sugar, Snowbird, Sugar Ann, Sugar Bon, Sugar Daddy, Sugar Mel, Sugar Rae. Peultjes:Kleine lieverd; container 1′ diep x 1′ breed.
- Paprika's: Alle varianten:Canapé, Jalapeno, Jingle Bells, Keystone, Peppery Pot, Pimento, Resistente Giant, Red Cherry, Yolo Wonder; container 16″ diep x 18″ diep.
- Aardappelen: Charlotte, Cobbler, Irish, Epicure, Kennebec, Red Pontiac, Rose Finn Apple, Russian Banana, Yukon Gold; houder
- Pompoenen: Autumn Gold Hybride, Baby Boo, Baby Bear, Bushkin, Jack Be Little, Small Sugar, Sweetie Pie; container 24″ diep.
- Radicchio: Chioggia Red Preco, Fiero, Indigo, Pall de Fuoco Rossa; Daikon; container 8″ breed x 6-8″ diep.
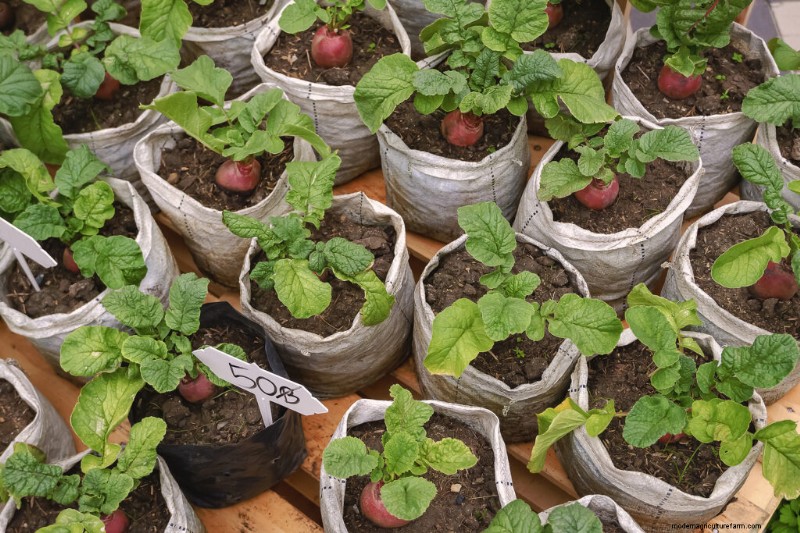
- Radijs: Burpee White, Champion, Cherry Belle, Comet, Icicle, Early Scarlet Globe, French Breakfast, Red Boy, Sparkler; container 5″ breed x 4-6 inch diep.
- Spinazie: Elke variant:American Viking, Long Standing Bloomsdale, Melody; container 6-8″ breed x 4-6″ diep.
- Zomerpompoen: Crookneck, Early Yellow Summer, Eightball, Gold Rush, Goldberg, Park’s Creamy Hybrid, Peter Pan Scalloping, Pic-N-Pic Hybrid, Richgreen Hybrid, Straightneck, Sunburst, Zephyr; container 24″ diep.
- Winterpompoen: Butterbush, Bush Acorn, Bush Delicata, Bush Table, Cream of the Crop, Table King, Queen Heart of Gold; container 24″ diep.
- Aardbeien: Alpine, Sarian, Tristar; container 8-12″ diep.
- Zoete aardappel: Beauregard, Georgia Jet, Vardaman; container 20 gallon.
- Tomaten :Basket Pak, Container Choice, Gardener's Delight, Husky Gold, Husky Red, Lunch Box, Micro-Tom, Patio VF, Pixie, Red Cherry, Rutgers, Saladette, Small Fry VFN, Spring Giant, Sundrop, Super Bush, Sweet 100, Tiny Tim, Toy Boy, Tumbling Tom, Yellow Canary, Yellow Pear, Whippersnapper; containerdwergcultivars:6-8″ breed x 1′ diep, standaard cultivars:2′ breed x 2-3′ diep.
- Raap: Hakurei, paarse top witte wereldbol; container 10-12″ breed x 12″ diep.
Bieten groeien in kweekzakken
Dwerg- en miniatuurgroentevariëteiten
Miniatuur-, dwerg- en dwerggroenten zijn goede selecties voor de containerteelt. Echte dwergvariëteiten hebben bij volledige rijpheid eetbare delen die kleiner zijn dan gewone groentevariëteiten en cultivars. Miniaturen, dwergen en dwergen verschillen van groenten die als ‘baby’-groenten worden verkocht; dit zijn over het algemeen full-size cultivars die vóór de volwassenheid worden geplukt. Babymaïs is bijvoorbeeld meestal gewone maïs die vroeg wordt geoogst, net op het moment dat de zijde uit de schil komt.
Dwerg- en miniaturen hebben weinig kweekruimte boven de grond nodig en zijn zeer geschikt voor containers. Maar omdat de planten en vruchten kleiner zijn, kan niet van deze gewassen worden verwacht dat ze de keukentaken of volwaardige variëteiten vervullen. Denk aan dwergen en dwergen voor bijgerechten of roerbakgerechten.
Wat het kweken van miniatuurgroenten betreft, zijn, afgezien van de onderlinge afstand en de vaak vroege oogst, normale teeltpraktijken van toepassing. Miniatuurgroenten hebben dezelfde eisen aan grond, water, voedingsstoffen en licht als gewone variëteiten.
M miniatuur groenteras | Dagen om te oogsten | D beschrijving | BONEN container van 5 gallon, 25 cm uit elkaar Dwergbijen 80 18- tot 60-inch loper Thorogreen 68 18-inch hoog Lima
BIETEN Twee tot vijf centimeter van elkaar Burpee's Gold Beet 55 1 inch diameter
5 gallon container, 3 planten per 54 Golfbalformaat Spinel 52 1½ inch rond Chioggia 55 Italiaans erfstuk
KOOL 5 gallon container per plant Babyhoofd 72 2½-inch hoofden Moderne Dwerg 65 4-inch hoofden
CANTALOUPE Gladiator Early Sugar Midget 60 Medium vine Midget Muskmelon 60 3-voet wijnstokken Minnesota Midget 63 4-inch meloenen Short ‘n Sweet 62 Bushy
WORTELS Een tot vijf centimeter uit elkaar Bunny Bite 65 1½ inch wortel Little Finger 65 Cilindrisch Short ‘n Sweet 68 4-inch wortels taps toelopend Thumbelina 60 Hapgrootte Tiny Sweet 65 3-inch wortels
MAÏS 5-gallon container, 45 cm uit elkaar Baby Asian 65 4-5 inch oren Faribo Golden Midget 60 30-inch planten Golden Midget 60 2- tot 3-foot stengels Golden Miniatuur 54 5-inch oren
KOMKOMMER 5 gallon container, 15″ uit elkaar Babykomkommer 52 Struikachtige liaan, vroeg Bush Whopper 55 Geen uitlopers Kleine Minnie 52 Struiken tot 60 cm Dwerg 50 60 cm hoge trossen, vroeg Patio Pik 55 Snijmachine voor manden Pot Luck 56 Plant van 18 tot 24 inch
AUWINE 15 tot 20 cm lang fruit Vroeg Black Egg 65 5 inch fruit, zacht Easter Egg 65 2-3 inch lang Little Fingers 68 Bush, de vroegste vrucht Morden Midget 65
5-gallon container per plant Nagaoka New Kissin 65 10 cm fruit, vroeg Sier Wit 60 Vroeg, 5 cm fruit Paars Ingelegd 70 Kleine aubergines Slanke Jim 65 Ingelegd, heel klein
SLA Vier tot tien centimeter uit elkaar Midget 55 Buttercrunch Sweet Midget Cos 60 5 inches lang, rechtopstaand Tom Thumb 65 Tennisbalformaat, Buttercrunch
UIEN Twee tot drie centimeter uit elkaar Barletta 70 Kleine, ronde beitsen Quicksilver 70 Kleine parel Silver Queen 70 Kleine parel
ERWTEN Vijf centimeter uit elkaar American Wonder 61 12-inch planten, vroege Greater Progress 62 18-inch liaan
Aardappelen Zes tot twintig centimeter uit elkaar Ladyfinger 80 10 tot 15 cm lang
POMPOENEN Kies een golfbalformaat, compacte groei Jack-Be-Little 90 3 inch breed Mini-Jack 90 3 tot 4 inch fruit Wee-B-Little 85 2 tot 4 inch fruit SQUASH-SUMMER Twaalf tot 50 cm uit elkaar Benning's Green Tint 50 Sint-jakobsschelp Cousa 50 Libanees, 10 cm lang
SQUASH-WINTER Twaalf tot 50 centimeter uit elkaar Jersey Golden Acorn 50
5 gallon container per plant TOMATEN 5-gallon container, 30 cm uit elkaar Druppeltje 65 Bepaald, overvloedig Vroege Salade 45 6 tot 8 inch Patio 70 15 tot 30 inch, vroeg Pixie 50 24 inch liaan Presto 60 Lang seizoen, vroeg Mooie Patio 70 30 inch hoog, overvloedig Rood Kussen 65 18 inch hoog, kersen Salade Top 50 18 inch hoog Klein Fry 60 Zware kropper, vroege Stoke’s Alaska 55 18-inch struik, vroege Tiny Tim 50 15-inch liaan, vroege Toy Boy 60 2 voet lang, vroege Tumblin’ Tom 55 20- tot 24-inch liaan
WATERMELOEN 5 gallon container, 30 cm uit elkaar Burpee Sugar Bush 80 6-8 pond Family Fun 88 Iets langwerpig Golden Midget 65 8 inch ronde Lollipop 70 3-5 pond Market Midget 69 3-5 pond, zoet New Hampshire Midget 68 7 inch in diameter, kort seizoen Petite Sweet 65 8 pond, extra suiker Sugar Baby 80 8 inch in diameter, zoet Suiker Bal 65 12-15 pond, multi-fruit Sugar Doll 72 8-10 pond, zoet Suikerklontjes 78 8-9 inches in diameter Yellow Doll 68 3-5 pond You Sweet Thing 70 12-13 pond, rond, gestreept
Gewassen in containers verdelen
Het is essentieel om een groenteplant de ruimte te geven die hij nodig heeft om te rijpen. Een goede afstand zorgt ervoor dat de wortels niet strijden om vocht en voedingsstoffen en dat de bovengrondse groei niet overvol is en blootstelling aan licht en een goede luchtcirculatie nodig heeft (essentieel voor het voorkomen van ziekten).
Blad- en wortelgewassen kunnen in containers worden gestart door zaad te verspreiden, maar zodra de planten 2,5-5 cm hoog zijn geworden, moeten ze worden uitgedund. Vruchtgewassen, zoals tomaten en paprika's, kunnen het beste worden gestart in kleine potten van 7-10 cm en later worden overgeplant naar grotere containers.
Voorgestelde minimale ruimte tussen planten die volwassen worden in de container:
- Artisjokken: Afzonderlijk planten; 38 liter aarde per plant
- Bonen: 7,5-23 cm uit elkaar
- Bieten: 5-23 cm uit elkaar
- Broccoli: 25 cm uit elkaar; 5 gallons (19L) aarde per plant
- Brusselse spruitjes: 25 cm uit elkaar; 5 gallons (19L) aarde per plant
- Kool: 25 cm uit elkaar; 5 gallons (19L) aarde per plant
- Wortelen: 2,5-5 cm uit elkaar; container van 15-20 cm diep
- Bloemkool: 30 cm uit elkaar; 5 gallons (19L) aarde per plant
- Aubergine: 15 inch (38 cm) uit elkaar; 5 gallons (19L) aarde per plant
- Boerenkool: Dun tot een onderlinge afstand van 41 cm
- Sla: 4-10 (10-25 cm) inch uit elkaar
- Meloenen: 15 inch uit elkaar; 19 liter aarde per plant
- Mosterdgroen: Dun tot een onderlinge afstand van 10 cm
- Okra: 20 inch uit elkaar; 5-10 gallon (19-38L) aarde per plant
- Uien: 2-3 inches (5-7.6 cm) apart
- Peas: 2 inches (5 cm) apart
- Peppers: 8 inches (20 cm) apart; 2½ gallon (9.4L) soil per plant
- Potatoes: 6 inches (15 cm) apart
- Radishes: 1 inch (2.5 cm) apart
- Rhubarb: 12 inches (30 cm) apart; 5 gallon (19L) soil per plant
- Rutabagas: 2 inches (5 cm) apart
- Spinach: Thin to 5 inches (13 cm) apart
- Squash: 12-20 inches apart; 5 gallons (19L) of soil per plant
- Swiss chard: Thin to 8 inches (20 cm) apart
- Tomatoes: ½-5 gallon (2-19L)soil per plant depending on the variety
- Turnips: 6 inches (15 cm) apart
When to plant vegetables in containers
Success in growing vegetables is all about timing—in the garden or in containers.
The temperature has much to do with success growing in containers. Root vegetables are cool-season crops. Leaf and stem crops prefer cool weather. Warm temperatures—and longer days—are needed for fruiting vegetables to grow and mature.
Knowing the average last frost date in spring and the average first frost date in fall will help you plan when to sow seed or set out starts or seedlings—those dates help define the cool-weather crop season and the warm-weather crop season. Mark your calendar with the frost dates, then schedule your planting and harvest. Each crop may have a different start and end date, but a simple calendar will help you keep the garden running smoothly—planting and harvesting.
To make sure you have plenty of time for fruiting crops such as tomatoes, peppers, eggplant, and melons to ripen, you may want to jump-start the season by starting seeds indoors before the last frost.
Lima beans growing in a pot
Container planting and harvest times
Here are suggested seed sowing and harvest times for crops you can grow in containers on a patio, balcony, or rooftop.
- Asian Greens: Plants prefer to grow in cool weather; sow seed in early spring and again in late summer. Some can grow inside during winter under lights or in a windowsill; keep temperatures below 70°F (21°C). Most Asian vegetables require 30 to 50 days to reach harvest—depending on the variety.
- Asparagus: Start with one-year-old plants from a nursery (sold as roots in late winter). Plant roots as soon as the danger of frost is past. Harvest comes in the second year after planting; the plant can remain productive for 20 years.
- Beets: From seed, the crop is ready in 8 to 10 weeks; time sowing so that harvest is complete before or well after the summer heat.
- Beans: Sow seeds in late spring and early summer; beans are cold-sensitive and should not be planted until after the last expected frost. Beans are ready in 60 to 70 days.
- Broccoli: Grow broccoli from seedlings. In cold-winter regions, starts can go into the garden two weeks before the last expected frost. Put in a second planting in midsummer for fall harvest. In mild-winter regions, set out starts from early fall through late winter. Time planting so that the crop matures before it becomes really hot. Broccoli is ready to harvest in 8 to 10 weeks.
- Brussels sprouts: Start from seedlings. Brussels sprouts require four to five months of cool weather to mature or a summer temperature of 65°F (18°C) or less. In hot summer regions start in early summer to mature in cool fall weather. Brussels sprouts are ready for harvest in 2 to 3 months.
- Cabbage: Late winter and early spring plantings should be timed to reach maturity before the arrival of hot summer days. Start crops for fall and winter harvest in mid-summer. Cabbage is ready for harvest in 60 to 110 days depending upon the variety.
- Carrots: Start in spring about the time of the last frost and continue until 60 days before the first frost in fall; with ample moisture, they can be grown in the summer heat. Provide shade where exceptionally hot. Carrots mature in 8 to 12 weeks depending on the variety.
- Cauliflower: Bring cauliflower to harvest in cool weather. From seed to harvest allow 12 weeks; from starts to harvest allow six to eight weeks. In cool spring and early summer regions, start plants in late winter or early spring. In warm spring and summer regions, start from seedlings in mid-summer for a fall harvest.
- Celery: Seeds are very slow to germinate so it’s easier to start with seedlings from the garden center. In mild-winter regions, grow celery for winter harvest. In warm-summer regions, plant celery in late summer for fall harvest. Celery is ready for cutting 16 to 18 weeks after sowing.
- Collards: Sow seed in early spring and summer. From seed to harvest allow eight or nine weeks.
- Corn: Sow seed in late spring after frost danger is past or set out starts two weeks after the last frost; in mild winter regions sow in late summer for a fall crop. Corn is usually ready 65 to 80 days after sowing.
- Cucumbers: Sow after temperatures rise to a constant 60°F (15°C) Make a second sowing one month later. Cucumbers are ready to harvest 50 to 60 days after sowing.
- Eggplant: Start with young plants from a nursery or by seed sown indoors at least two months before you plan to transfer them to outdoor containers. Eggplants are ready for harvest 60 to 75 days after sowing—if days and night temperatures stay consistently warm, 70°F (21°C).
- Garlic: Sow cloves in the fall to harvest large bulbs the following summer. In cold-winter regions protect the crop from freezing by covering and insulating the container.
- Horseradish: Start with root cuttings from established plants after the danger of frost has passed. Horseradish is a perennial; protect the container from freezing in winter.
- Jicama: Start seeds indoors for three months before setting it out in a container after the danger of frost has passed. Jicama requires three months of warm temperatures to reach harvest.
- Kale: If summers are cool with an average daytime temperature of 75°F (24°C) or less sow in spring, otherwise sow in midsummer to grow in the cool of fall. Frost improves the flavor. Kale is ready for harvest in 55 days.
- Leeks: Sow indoors at least two months before the last frost. Starts that are 8 inches/ 20 cm tall can be set out in containers from early to mid-summer and can grow for up to 3 months.
- Lettuce: Sow seed in succession from early spring to fall; seed germinates rapidly but starts can be planted where time is short. Allow 50 to 70 days from seed sowing to harvest.
- Melons: Start seed indoors for 4 to 6 weeks before setting them out in a container. Seed can be planted outdoors after the weather warms to 60°F (15°C). Cantaloupes, honeydews, and watermelons require at least 70 days to come to harvest.
- Okra: Okra loves warm weather; sow seed after nighttime temperatures average 65°F (18°C). Allow 55 days to harvest.
- Onions: Plant onion sets or seeds in early spring and make successive sowing. Grow for stems in cool weather—below 70°F (21°C)–for bulbs in warm weather. Bulb onions are ready to harvest in 100 to 110 days; shallots are ready to harvest in 60 to 70 days.
- Peas: Start seed indoors or sow outdoors three weeks before the last expected frost. Fall sowing is recommended for areas with mild winters. Peas are ready for harvest in 55 to 70 days.
- Peppers: Sow seed indoors eight weeks before you plan to set plants out; set out transplants after average temperatures reach 60°F (15°C). Sweet peppers are ready for harvest in 70 days; hot peppers require 60 to 100 days depending on the variety.
- Potatoes: Sow seed potatoes in early spring; potatoes are cold tolerant so you can plant them before frost has passed. In mild-winter areas plant potatoes in mid-summer for a winter harvest. Potatoes are ready between 75 and 130 days to harvest.
- Pumpkins: Sow seeds in the container after the danger of frost has passed or set out starts two or three weeks after the last frost. Most varieties require 100 days or more from sowing to harvest.
- Radishes: Sow radishes indoors anytime during the year; outdoors avoid growing in midsummer and sow the last outdoor crop three to four weeks before the last killing frost. Harvest in 25 to 50 days depending on variety.
- Rutabaga: Crop will mature from seed in three months; time sowing so that harvest comes before or after the summer heat.
- Spinach: Sow seed in early spring and early fall for windowsill and outdoor containers. Make successive plantings ten days apart. Temperatures in the 80°sF (26°C) will cause the crop to bolt. Spinach requires 45 to 50 days from sowing to harvest.
- Squash: Sow seed indoors three to four weeks before the last expected frost; set plants out two weeks after all danger of frost has passed. In warm-winter areas start seed in late summer or set out transplants for fall harvest. Zucchini and other summer squashes require 40 to 45 days to reach harvest from sowing; winter squashes require 70 to 100 days depending on the variety.
- Sweet Potatoes: Start from slips outdoors after all danger of frost has passed. The crop requires 100 to 120 days to reach harvest.
- Swiss Chard: Sow in containers year round except where winters are harsh, then sow in late spring. From seed to harvest allow 55 days.
- Tomatillo: Sow seeds indoors a month before the last expected frost. Set out plants two weeks after all danger of frost has passed. From sowing to harvest allow 85 days.
- Tomatoes: Transplant starts to outdoor containers about two weeks after the last frost. Start seed indoors 8 weeks before you plan to transplant to containers outdoors. Tomatoes require 55 to 100 days to reach harvest depending on the variety.
- Turnips: Crop will mature from seed in two months; time sowing to mature crop before or after the summer heat.
Water, weeding, and care
Container plants almost never need weeding, but you will need to water them more frequently. Container soil should be moist to the touch, but never soggy:too much water rots roots. Water immediately after planting to wash potting mix from the foliage, after that, use a watering can with a fine-rose nozzle to water so as not to disturb the planting mix. (If watering indoors, use a kitchen measuring cup.) Another technique is to water from below, by placing the pot in a watering tray and allowing the water to wick up into the pot for an hour or two. It’s best to water early or late in the day so that the rays of the sun do not damage wet leaves. In warm weather be sure to check your containers every day to make sure they are not dry. Water whenever the soil is dry to a depth of 1 inch. Don’t let containers dry out; that will interrupt quick growth which is essential to container vegetable gardening and can cause plants to drop blossoms and fruits.
Whenever you water look for weeds and remove them and trim away any dead leaves or debris and check for insect pests. Most insect pests can be stopped early with a spray of insecticidal soap–a light squeeze of dish soap in a spray bottle. Twice during the growing season give your container vegetables a feeding of compost tea; this should be enough to replenish the nutrients they draw from the soil. At the start of the next season, it’s best to begin again with fresh, nutrient-rich soil.
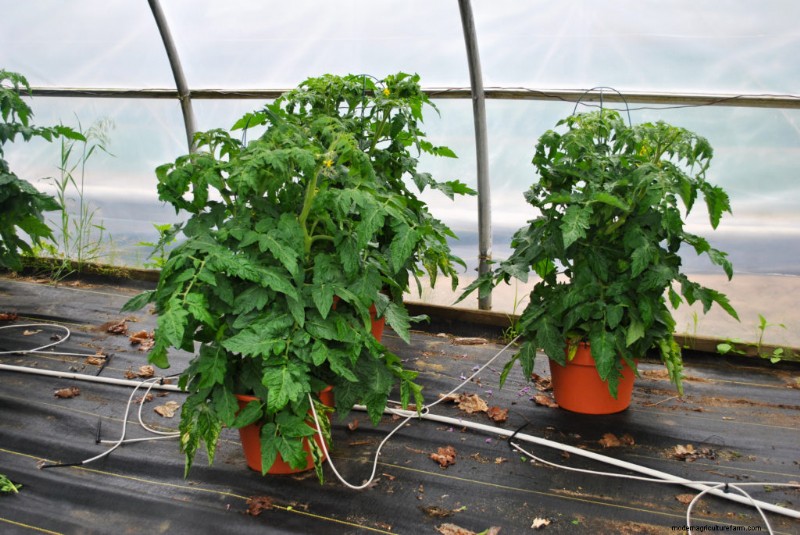
Bush tomatoes in large pots
Care and feeding container vegetable garden crops
Vegetables growing in containers on patios, balconies, or rooftops require special care when it comes to watering and feeding.
Containers have a limited capacity for storing essential nutrients and moisture that ensure plant growth. The gardener must closely monitor container crops to be sure they are growing uninterrupted which, in turn, leads to the best yield and flavor.
Almost all growing crops demand even moisture—that means never letting the soil go completely dry and never overwatering leaving the potting mix soggy. A compost-rich potting mix may supply nearly all the nutrients a crop will need over the length of a season—but feeding with an organic fertilizer may be necessary where containers are small or multiple plants are growing (nutrients are essential).
Use a moisture meter to monitor watering if you have any doubts about how wet or dry your containers are. All garden centers and nurseries will have both dry and liquid organic fertilizers. Ask which fertilizer they recommend and then follow the label directions carefully; it’s always safer to under-fertilize than over-fertilize.
Here are care and feeding suggestions for vegetable growing in containers on a patio, balcony, or rooftop.
- Asparagus: Water every five to seven days during the summer and feed twice a year (early spring and late summer) with a complete liquid fertilizer diluted to half strength. When the leaves begin to brown in autumn cut stems to soil level.
- Beets: Keep the soil just moist throughout the growing season (never over water). Thin seedlings when they are 6 inches tall to stand 3 to 4 inches apart. After thinning, feed once with a complete liquid fertilizer diluted to half strength. Don’t let the soil crust–gently cultivate with a trowel or hand cultivator.
- Beans: Keep the soil just moist as plants develop. Later water deeply. Once plants are a foot tall (30 cm) high, thin to strongest plants and feed keepers with a complete liquid fertilizer diluted to half strength. Feed a second time when pods begin to form.
- Broccoli: Keep soil evenly moist. Feed with a complete fertilizer at full strength twice during the growing season—first when plants are about 8 inches tall and again before heads begin to form. Broccoli is heat sensitive and will bolt and flower when temperatures get into the high 70°Fs (21°C).
- Brussels sprouts: Keep the soil evenly moist water; don’t let it dry out. Feed when sprouts are beginning to form with a complete liquid fertilizer at half strength. As the sprouts begin to cluster, twist off the leaves beneath to transfer growing energy to form more sprouts.
- Cabbage: Keep the soil evenly moist; it must not dry out. Once transplants are established, feed every three weeks until heads begin to form; use high nitrogen, high potassium fertilizer diluted to half strength. Keep soil mounded around the base of the plant to encourage new root development; this will stabilize the plant and hasten maturity.
- Carrots: Keep the soil just moist until harvest. Thin seedlings as they grow to 2 inches between the strongest plants. Feed after the final thinning with a complete liquid fertilizer diluted to half strength; feed again two to three weeks before harvest.
- Cauliflower: Keep the soil evenly moist. The most common problem encountered when growing cauliflower is its failure to set heads. This can be caused by uneven watering or the soil going dry during a heat wave. Feed plants when well-established with a complete fertilizer diluted to half strength and again as curds form. When a head forms, tie the outer leaves up over the head with twine. This will protect the head from the sun and help the curd to blanch.
- Celery: Celery is a bog plant that requires ample, consistent water to thrive. Feed with complete fertilizer diluted to half strength every two weeks. Keep soil mounded up around the base of each plant to stabilize upright growth. Blanch celery quickly by covering the stalks (leaving the top leaves exposed) with a paper bag or opaque plastic seven to ten days before harvest.
- Collards: Keep the soil evenly moist. Mist leaves on hot, dry days. Feed with high nitrogen, and high potassium fertilizer at full strength twice during the growing season.
- Corn: Corn requires eight hours of sun each day to produce the best crop. If full sun is an issue, look for a hybrid suited to your region. Thin plants to 12 inches (30 cm) apart as they mature. Keep the soil evenly moist; don’t let it dry out especially when the weather is hot and dry. Feed with a 5-10-10 fertilizer at full strength every three weeks.
- Cucumbers: Keep the soil evenly moist. Keep the potting mix warm; use black plastic mulch until the weather heats up then switch to aluminum foil; this reflects heat and light under the foliage which discourages aphids. Feed with a high phosphorus fertilizer diluted to half strength when the plant begins to flower and then every other week until harvest.
- Eggplant: Keep the soil evenly moist throughout the growing season; do not let the soil dry out. Feed monthly with a complete fertilizer diluted to half strength. Keep plants in a warm, sunny location. Protect plants on cool nights by covering them with a light plant blanket; cool weather stunts growth and reduces yield.
- Garlic: Keep the soil just moist—not wet. As plants mature make sure containers are in a warm, sunny location.
- Horseradish: Keep the soil mix evenly moist. Feed once during the season with a complete fertilizer at full strength.
- Jicama: Keep the plant in a sunny location for at least six hours each day. Keep the soil evenly moist–never soggy. Feed with a 10-10-10 liquid fertilizer at full strength once during the growing season.
- Kale: Keep the soil just moist. Thin plant to 8 inches (20 cm) apart. Feed with high nitrogen, and high potassium fertilizer at full strength twice during the growing season.
- Leeks: Keep the soil evenly moist–never soggy, which can cause rot. Cool weather will not hurt plants. Blanch leeks by setting a section of 2-inch-diameter opaque plastic tubing or pipe over each one when the stems begin to thicken (mounding with soil is not practical in containers).
- Lettuce: Keep the soil evenly moist but not wet until heads form—too much water can cause rot or head varieties to crack. Feed lightly every two weeks with a complete liquid fertilizer diluted to half-strength. Hot weather can cause non-bolt-resistant varieties to flower. Protect plants from the hot sun with shade cloth.
- Melons: Keep the soil evenly moist; do not let it dry out but be careful not to overwater; overwatering can cause fruit to crack and may reduce sugar content. Keep foliage dry to avoid fungal diseases. Add slow-release 10-10-10 fertilizer into the soil after vines flower; side dress with water-soluble fertilizer a couple of weeks before the first harvest. Melons thrive in warm temperatures. If the weather cools or in short-season regions keep the soil mix warm by covering it with black plastic and positioning containers in direct sun all day. Allow vines to trail or train vines to a trellis if the container is heavy and will not tip. Support trellised melons with netting.
- Okra: Okra grows best in warm weather; sow seed after nighttime temperatures average 65°F (18°C). Keep the soil just moist—never wet.
- Onions: Keep the soil evenly moist throughout the growing season to ensure good bulb development—but don’t overwater which can cause rot. Onions are heavy feeders and should be given a 5-10-10 liquid fertilizer at full strength twice a month.
- Peas: Keep the soil barely moist. Thin seedlings to 3 inches apart and train climbing types on string netting or wooden trellises when tendrils appear. Feed twice during the growing season with a low nitrogen 5-10-10 liquid fertilizer diluted to half strength (too much nitrogen will stimulate leafy growth at the expense of the pods).
- Peppers: Keep the soil evenly moist but not wet throughout the season and particularly during fruit development. Feed with a complete fertilizer diluted to half strength when plants are well established and once more just before blossoms open. Peppers grow best when night temperatures do not dip below 68°F (20°C) at night and stay between 75-80°F (24-26°C) during the day. Use a floating row cover or shade cloth to protect the fruit from sunscald if the weather turns hot (over 90°F/ 32°C).
- Potatoes: Grow potatoes in a sunny location. Keep the soil evenly moist; drought and drench cycles create deformed tubers.
- Pumpkins: Keep the soil evenly moist and do not let it dry out for best fruit development. Avoid wetting leaves which can lead to fungal diseases. Feed after blooming with a 10-10-10 fertilizer at full strength.
- Radishes: Keep the soil evenly; do not let it dry out—but don’t let it get soggy. Thin to strongest seedlings, 3 inches apart. Feed with a 10-10-10 liquid fertilizer, diluted to half strength. One feeding per crop is all that is needed.
- Rutabaga: Keep soil evenly moist throughout the growing season. Thin established seedlings 6 to 8 inches (15-20 cm) apart. Feed one week after thinning and again three weeks after thinning—with a complete liquid fertilizer diluted to half strength.
- Spinach: Keep soil evenly moist throughout the growing season. Once plants are well-established begin feeding with a high nitrogen fertilizer diluted to half strength every two weeks. When plants are 3 to 4 inches (7-10 cm) tall, and thin so the remaining seedlings are 6 inches (15 cm) apart.
- Squash: Keep potting mix evenly moist; keep water off foliage that is susceptible to mildew. Grow squash in a bright sunny place for the best yield. Place black plastic sheeting around the base of plants early in the season to conserve moisture and warm plants; later use aluminum foil to conserve moisture and repel insects with bright reflected light under leaves. Feed with a 10-10-10 fertilizer after fruit sets.
- Sweet Potatoes: Once transplants are established, keep the potting mix just moist—never wet. A month after setting in slips, sprinkle a 10-10-10 slow-release fertilizer into the soil avoiding contact with the stems.
- Swiss Chard: Keep the soil evenly moist throughout the growing season; too little water will cause the leaves to be stiff and coarse. Thin seedlings when 2 to 3 inches (5-7 cm) tall to 6 inches (15 cm) apart. Feed with a complete liquid fertilizer every two weeks once plants are established.
- Tomatillo: Be sure plants get a full day of direct sun. Keep the potting mix just moist throughout the growing season.
- Tomatoes:Keep the soil just moist throughout the growing season; do not let it go dry out and do not overwater (a dry-wet cycle can cause cracking or blossom-end rot). Feed with low nitrogen, high phosphorus food once a month while fruits are developing. Just before harvest stop feeding. Plants sheltered from the wind should get a gentle shake during flowering (this will help ensure pollen drop from the anther onto the stigma—the tomato has a complete flower that self-pollinates).
- Turnips: Keep soil evenly moist throughout the growing season. Thin established seedlings 6 to 8 inches (15-20 cm) apart. Feed one week after thinning and again three weeks after thinning—with a complete liquid fertilizer diluted to half strength.
Herbs growing in clay pots
Water-wise crops for containers
Crops that are relatively drought tolerant are best for containers or gardens where water is not easily accessible. Water-wise crops are a good choice for balconies, rooftops, and patios.
All crops need water to grow—especially when first planted and until they are well-established. The best course is to keep the soil just moist—not too wet and not dry whenever possible.
Water pots less than 8 inches (20 cm) in diameter from above; use a 1-quart kitchen measuring cup. Large pots can be watered with a plastic pail, watering can, or a gentle stream from a hose.
Let the soil in a pot or container dry out to 1 inch (2.5 cm) deep before watering again. Infrequent watering is better than watering too often but never let the soil in a container go completely dry.
If you have a large number of pots, a drip irrigation system that hooks up to a faucet or spigot may be the most efficient course.
Water-wise crops include:
- Artichokes
- Beets
- Wortelen
- Chard
- Garlic
- Herbs—bay, lemon verbena, oregano, rosemary, sage, thyme
- Kale
- Peas
- Scallions
- Spinach
Where water is scarce or not easily accessible, avoid these very thirsty crops:potatoes, strawberries, tomatoes, eggplants, peppers, cucumbers, and zucchini.
Planting combinations
You don’t have to grow just one vegetable in a container. Edible flowers such as pot marigolds and violas can be grown with lettuce. Grow leaf lettuce with parsley, chives, and coriander. Lettuce, onions, beets, and garlic can be grown in a large container with broad beans. Small-fruiting peppers such as ‘Tabasco’ or ‘Serrano’ will make a colorful patio container. Grow tomatoes and basil or thyme together. Ruby chard in its own pot is a colorful accent for any deck.
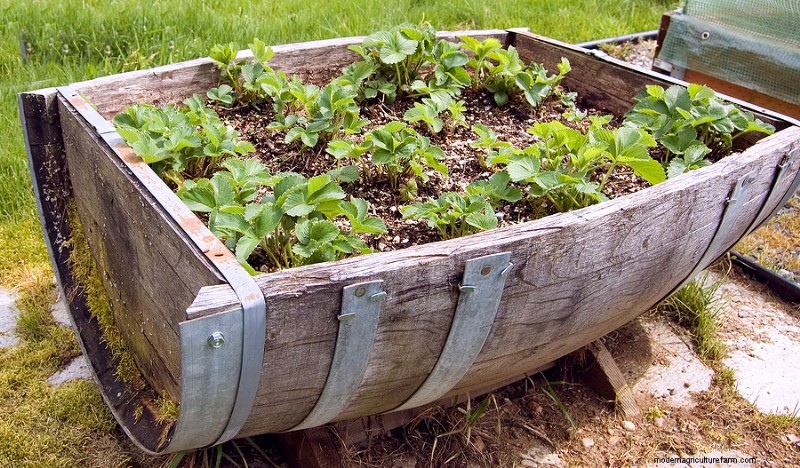
Growing strawberries in a half barrel
Keep your container garden growing
For an extended harvest, make small sowings of different vegetables every three to four weeks during the growing season. Leafy crops can be harvested cut and come again every couple of weeks. To extend the tomato harvest plant two patio varieties a month apart. When the weather turns cold, your container crops can be moved to a warmer location or you can use large clear plastic bags draped over wire frames to form mini-greenhouses that will keep plants growing several weeks after the first frost in autumn. Most vegetables will not grow in the house over the winter; they require a special combination of heat, sunshine, and humidity that is best found in a greenhouse or cold frame. But herbs can be grown indoors over the winter. Expose herbs to gradually warmer temperatures on a porch or in the garage before bringing them into the house for the winter. Herbs can be placed in a sunny window to be enjoyed almost indefinitely.
Ook interessant:
Windowsill Gardening
Garden Planning Books at Amazon:
- Vegetable Garden Almanac &Planner
- Kitchen Garden Grower’s Guide Vegetable Encyclopedia
- Vegetable Garden Grower’s Guide
- Tomato Grower’s Answer Book


