Welkom bij
Moderne landbouw
!

De champignonteelt in India groeit stap voor stap als een alternatieve bron van winst voor veel mensen. Wereldwijd, de VS, China, Italië en Nederland zijn de topproducenten van champignons. In India, Uttar Pradesh is de grootste producent van paddenstoelen, gevolgd door Tripura en Kerala.
Wat is Champignonteelt?
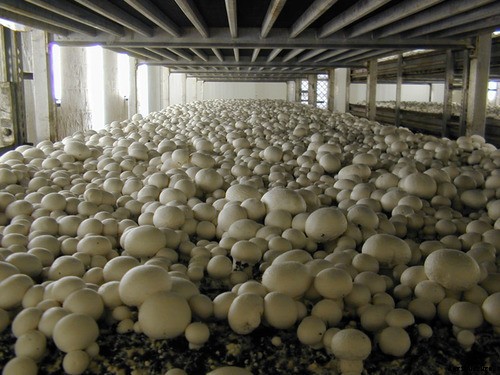
Paddenstoelen zijn het vruchtlichaam van een schimmel, net zoals appels de vruchtlichamen zijn van een appelboom. Een paddenstoel is een soort schimmel die de Latijnse naam Agaricus bisporus heeft. Paddenstoelen behorend tot schimmelsoorten zijn een voedzame vegetarische lekkernij en een goede bron van hoogwaardige eiwitten (20-35 procent drooggewicht). Momenteel worden er 3 soorten paddenstoelen gekweekt, namelijk, witte paddenstoel (Agaricus bisporus), de paddy-stro-paddenstoel (Volvariella volvacea) en de oesterzwam (Pleurotus Sajor-Caju).
In het plantenrijk, paddenstoelen worden gerangschikt bij heterotrofe organismen (lagere planten). In tegenstelling tot hoge, groene planten, deze heterotrofen zijn niet in staat tot fotosynthese. Schimmels zijn de aaseters van de natuur. In de champignonteelt, afvalproducten bestaande uit kippenmest, paardenmest, rietje, gips en afvalwater (van hun eigen compost) worden gebruikt om het zeer bevredigende substraat te leveren waaruit champignons zullen groeien. De ammoniak wordt via een ammoniakwasser uit de proceslucht verwijderd voordat deze wordt teruggegeven aan de natuur. Zelfs ammoniak uit de lucht wordt gebruikt als stikstofbron bij composteren.
de schimmel, ook wel mycelium genoemd, maakt gebruik van mest als energiebron voor de verbranding, bevrijdende energie die wordt gebruikt voor groei. Champignons bevatten veel vitamines en mineralen, zoals B-complex en ijzer, en zijn een goede bron van hoogwaardige eiwitten zoals lysine. Champignons zijn volledig vet (cholesterol)vrij en bovendien rijk aan antioxidanten.
Verschillende soorten Champignonteelt in India:
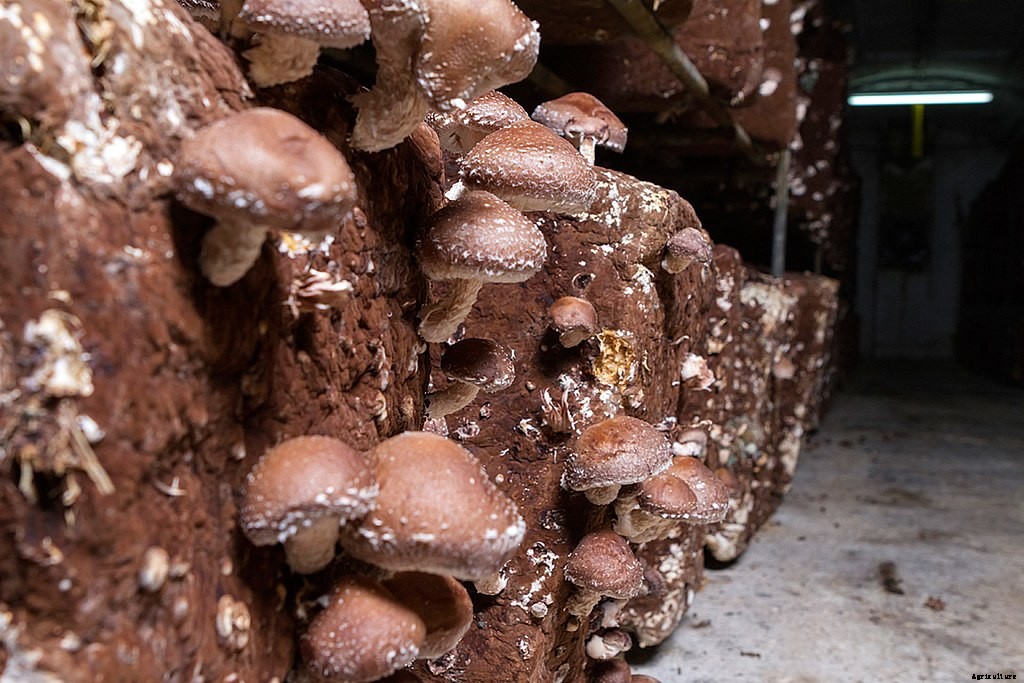
Er zijn drie soorten paddenstoelen die in India worden gekweekt, het zijn paddenstoelen, stropaddestoel en oesterzwam. Paddystro-paddenstoelen kunnen zich ontwikkelen bij temperaturen van 35⁰ tot 40⁰C. Champignons groeien ergens in de winter. In de noordelijke vlakten worden oesterzwammen gekweekt. Alle drie de paddenstoelen van zakelijk belang worden gekweekt met behulp van unieke technieken. Ze worden gekweekt op buitengewone bedden die compostbedden worden genoemd. Leer hoe u paddenstoelen van elk type kunt domesticeren.
Stappen van de champignonteelt:
De zes stappen van de champignonteelt worden als volgt gegeven:
Stap 1:Compostvoorbereiding
Om met dit fantastische landbouwidee te beginnen, moeten we ons volledig verdiepen in het concept van "compostvoorbereiding".
Deze eerste stap van compostvoorbereiding wordt over het algemeen buiten gedaan, hoewel een gesloten structuur met een schaduw erover kan worden gebruikt. Hier een betonnen plaat, ook wel een kade genoemd, nodig voor compostering. Plus, een compostdraaier om de ingrediënten te beluchten en te irrigeren, en een karretje om de ingrediënten naar de keerder te verplaatsen is nodig.
Vroeger werden palen met de hand gekeerd met hooivorken, die nog steeds een alternatief is voor mechanische gereedschappen en apparatuur, maar het is behoorlijk arbeidsintensief en fysiek veeleisend voor een baan als deze.
Het wordt allemaal gestart door de benodigde ingrediënten te mengen en nat te maken, aangezien ze zijn gestapeld in een stapel rechthoekige vormen met strakke zijkanten en een los midden. Normaal gesproken, de bulkingrediënten gaan door een compostdraaier. Hierna wordt er water gestrooid op bijvoorbeeld de paardenmest of kunstcompost, terwijl deze materialen langs de keerder bewegen. Nu worden stikstofsupplementen en gips (CaSO4. 2H2O) over de bulkingrediënten verdeeld en grondig en waakzaam gemengd door de draaier. Zodra de stapel doorweekt en gevormd is, fermentatie (compostering) begint als gevolg van de exponentiële groei en reproductie van micro-organismen, wat een natuurlijk proces is in de bulkingrediënten.
Deze compost voor het kweken van paddenstoelen ontwikkelt zich naarmate de chemische aard van de grondstoffen wordt omgezet door de activiteit van micro-organismen, warmte, en sommige exotherme chemische reacties. Deze dingen resulteren samen in een voedselbron die het meest geschikt is voor de groei van de paddenstoel en remt ook de ontwikkeling van andere schimmels en bacteriën. Er moet optimaal vocht zijn, zuurstof, stikstof, en koolhydraten die tijdens het hele proces aanwezig zijn, anders, het proces kan stoppen. Daarom worden water en andere additieven cyclisch en periodiek toegevoegd, en de composthoop wordt geschud terwijl deze door de keerder beweegt.
Interessant is dat hier gips wordt toegevoegd om de viscositeit te minimaliseren die de compost normaal gesproken heeft. Gips verhoogt de vloeibaarheid van bepaalde chemicaliën in de compost, en ze hechten aan stro of hooi in plaats van de porositeit tussen de rietjes te belemmeren. Behalve dit, het nevenvoordeel van dit fenomeen is dat lucht de stapel comfortabel kan doordringen, en de lucht is essentieel voor het composteringsproces. Door het buitensluiten van lucht ontstaat een anaërobe omgeving waarin verrotte chemische verbindingen ontstaan die zeer schadelijk zijn voor het gewas. Gips wordt aan het begin van de compostering toegevoegd met ongeveer 18 kg per ton droge ingrediënten.
Nog een ander belangrijk supplement zijn de stikstofsupplementen, die tegenwoordig algemeen worden gebruikt, omvatten bierbostel, zaadmaaltijden van sojabonen, pinda's, of katoen, en kippenmest, enz. Het hele en enige doel van deze supplementen is om het stikstofgehalte te verhogen tot 1,5% voor paardenmest of tot 1,7% voor synthetische, beide berekend op basis van droog gewicht. Synthetische compost vereist de toevoeging van ammoniumnitraat of ureum aan het begin van het composteren om de microflora van de compost te voorzien van een gemakkelijk beschikbare vorm van stikstof voor hun reproductie en groei.
Maar soms zijn de maïskolven niet beschikbaar of beschikbaar tegen een prijs die als exorbitant wordt beschouwd. Vervangers voor maïskolven zijn onder meer geraspte hardhoutschors of zaagsel, bijvoorbeeld, katoenzaadschillen, geneutraliseerd druivenpulp, cacaoboonschillen, en geneutraliseerd druivenpulp. Het beheer van een composthoop die een van deze materialen bevat, is uniek wat betreft de vereisten voor watergift en de tijd tussen het keren van de stapel.
In het begin, de composthoop moet 5 tot 6 voet breed zijn, 5 tot 6 voet hoog, en daardoor lang. Een tweezijdige doos kan worden gebruikt om de stapel (rick) te vormen, hoewel sommige draaiers zijn uitgerust met een "ricker", dus een doos is niet nodig. De zijkanten van de stapel moeten stevig en dicht zijn, toch moet het centrum tijdens fase I-compostering los blijven. Naarmate het stro of hooi zachter wordt tijdens het composteren, de materialen worden minder stijf en krimp kan gemakkelijk optreden. Als de materialen te compact worden, lucht kan niet op de loer liggen rond de stapel en er zou een luchtloze omgeving ontstaan.
Dit eerste composteringsproces duurt niet langer dan een paar weken, afhankelijk van de aard van het materiaal aan het begin en de kenmerken ervan op elk punt. Er is een sterke ammoniakgeur geassocieerd met composteren, die meestal wordt aangevuld met een zoete, muffe geur. Als de composttemperatuur 68 graden Celsius en hoger is, en ammoniak aanwezig is, er treden chemische veranderingen op die resulteren in een voeding die vrij exclusief door de paddenstoelen wordt gebruikt.
Als een bijproduct van de chemische veranderingen, er komt warmte vrij en de composttemperatuur stijgt. Temperaturen in de compost kunnen 76 tot 82 graden Celsius bereiken tijdens de tweede en derde beurt wanneer een gewenst niveau van biologische en chemische activiteiten plaatsvindt. Aan het einde van fase één moet de compost:1) een chocoladebruine kleur hebben; 2) zacht hebben, zachte rietjes, 3) een vochtgehalte hebben van ongeveer 68 tot 74 procent; en 4) een sterke ammoniaklucht hebben. Wanneer het vocht, temperatuur, kleur, en geur beschreven zijn bereikt, Gefeliciteerd! U bent nu klaar met stap 1.
Ik hoop dat je hebt genoten van Fase I van de champignonteelt!
Stap 2:Afwerking van de compost
Dus, laten we het composteringsproces gewoon helemaal beëindigen.
Nu u klaar bent met composteren in fase één, we’ll be heading towards the second and extremely important step that is “Finishing the Compost”.
Dus, here are two major reasons for Phase two or step 2 of composting. Pasteurization is necessary to kill any unwanted bacteria, insects, nematodes, pests, schimmels, or other headaches that may be present in the compost. And secondly, it is necessary to remove the ammonia which formed during Phase I composting. Ammonia at the end of Step 2 in a concentration higher than 0.07 per cent is often dangerous to mushroom spawn growth, so it must be eliminated; Gemiddeld, a person can sense ammonia when the concentration reaches the threshold of 0.10 per cent.
Whether the compost is kept in beds, trays, or bulk, should be spread uniformly in-depth and compression or density. Compost density should allow for the gas to move around, this would make sure that ammonia and carbon dioxide would be replaced by the outside air.
Step 2 composting can be perceived as a regulated, temperature-dependent, ecological process using air to maintain the compost in a temperature range optimal for the de-ammonifying organisms to grow and reproduce. The growth of these thermophilic (heat-loving) organisms depends on the availability of usable carbohydrates and nitrogen, some of the nitrogen in the form of ammonia.
Optimum management for Phase II is difficult to pinpoint and most growers(commercial) tend toward one of the two systems in common use today:high temperature or low temperature. Due to the jargon nature of this process, it’s quite difficult to put the variables into exact numbers.
For that, you need to consult online, with someone who has experience in this field and it’s better if you find that person in your vicinity.
Step 3:Spawning
Mushroom spawning is similar to the seedling stage in agriculture and means keeping the spawn (mycelium) of mushrooms that can be purchased from a laboratory at nominal prices. After laying the spawns evenly on the tray and distributing it ergonomically, cover it with a thin layer of compost and keep it moist. Cover the tray with a wet sheet of paper and sprinkle water at regular intervals. The trays can be stacked on top of each other at a spacing of 15–20 cm. Keep the walls and floors wet to maintain a humidity-filled environment and temperature at 25 ° C.
Step 4:Casing
Be a bit vigilant about this one!
The casing is a covering applied to the spawn-run compost on which the mushrooms slowly and steadily form. The constituents are, field soil clay-loam, a mixture of peat moss with ground limestone, or reclaimed weathered, spent compost that could be utilised as the casing.
The Casing doesn’t require nutrients as the casing only acts as a water reservoir and a place where the formation of rhizomorphs takes place. The Rhizomorphs look like thick strings and form when the very fine mycelium fuses.
Casing must be pasteurized to eliminate any insects and pathogens which it might be carrying. It’s also quite important that the uniformity of the layers remains intact. This allows the spawn to move into and through the casing at the same pace and, ultimately, mushroom growth happens tauta chromatically. The casing should be able to retain moisture since moisture is essential for the development of a healthy mushroom.
The crop management after casing requires that the compost temperature be kept at around 24° C for up to 5 days after casing, and the relative humidity should be high. Daarna, the compost temperature should be lowered to about -16.5°C each day until small mushroom initials have formed. Throughout the period following casing, water must be applied periodically to raise the moisture level to field capacity before the mushroom pins form. Knowing when, hoe, and how much water to apply to casing is an “art form” which is the subtle difference that acts as a trench between experienced growers from beginners.
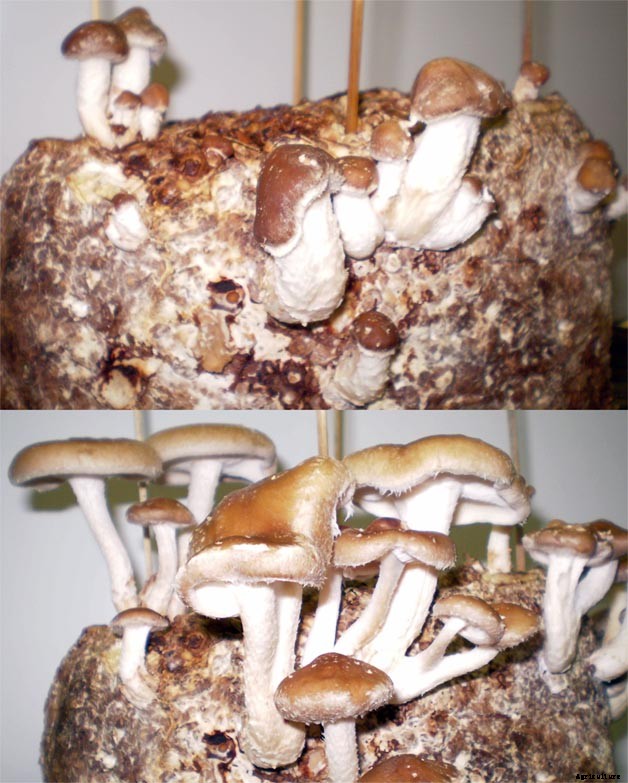
Step 5:Pinning
The Mushroom instigates as and when rhizomorphs have started growing in the casing. The initials are minuscule but can be seen protruding on a rhizomorph. Once an initial grow four folds in size, the structure is a pin. Pins continue to grow larger through the button stage, and ultimately a button enlarges to a mushroom. The harvestable crop appears after around three weeks or maybe a few days here and there. Pins develop when the carbon dioxide content of room air is lowered to 0.08 per cent or lower, depending on the skill set of the grower, by introducing clean and fresh air into the growing room. Outside air has a CO² content of about 0.04 %.
If the CO² is lowered too early by airing too soon, the mycelium ceases to grow through the casing and mushroom initials plunge to the surface of the casing. As such mushrooms continue to thrive, they push through the casing and are tedious at harvest time. Too little wetness can also result in mushrooms forming below the surface of the casing. Pinning affects both the potential yield and quality of a crop and is a stepping stone in the production cycle.
Step 6:Cropping
It’s the final but a step of utmost importance. The value you’ll be generating out of this business always goes hand in hand with the ingenuity you’re putting in the cropping process.
It varies from person to person and depends upon the given below factors:
These were some of the variables you have to take care of if you want good returns. This comes in naturally as you get more and more experienced in the trade.
Disease and pest controlling measures in Mushroom Farming:
Mushroom flies:
These flies are small, delicaat, black, yellowish or sometimes brown with different types of wing venation and size.
Management:
Spring is inside the wall of the mushroom house.
The insecticide should be added in the last turning of the compost.
Mites:
They are small in size and are Majorly white, yellow, red and brown.
They can be found running over the surface of the fruit bodies, mushroom beds and on the floors and walls of the mushroom houses.
They damage the crop by feeding on the spawn to make holes in the mushroom caps and stalks and cause stunting of fruit bodies as well as brown spots on the caps and stems.
Management:
Proper pasteurization of compost.
Proper hygiene and sanitation.
Disinfection of the mushroom houses by spraying 0.1% dicofol.
Burning sulphur in the empty room.
Springtails:
They are silver-grey 2 brown colours with a light violet band along the sides of the body and black cellular fields present on the head.
They are the main species that damage mushrooms.
They enter mushroom houses along with organic matter.
They feed on mycelium from spawn.
They also feed on the gills of the oyster mushroom destroying the lining and spit out the mycelial strands at the base of the stripes.
They also attack the fruiting bodies of button mushrooms and cause slight pitting and browning at feeding sites.
Management:
Cleaning surrounding and inside of the mushroom house.
Proper disposal of spent compost.
Proper pasteurization of composed and casing material.
Raising the crop above the floor level.
Diseases:
Fungal diseases dry bubble:Verticillium fungicola
They are Muddy brown, often sunken spots on the cap of the mushrooms.
Greyish white mouldy
growth was seen on the pileus.
In a later stage, de champignon
becomes dry and leathery.
Management:
Use clean equipment.
Control flies and mites.
Sanitary condition in growth house.
Bubbles can be destroyed with salt.
Infected mushrooms should be destroyed to prevent the spread.
Wet bubble:
Mycogen perniciosa:
Malformed mushrooms with swollen stipes.
Reduced or deformed caps.
Undifferentiated tissue becomes necrotic and a wet, soft rot emits a bad odour.
An amber liquid appears on infected mushrooms.
Mushrooms become brown.
Bubbles may be as large as a grapefruit.
It is also a parasite of wild mushrooms.
It produces two spore types, one which is small and water-dispersed like Verticillium. the second which is a large resting spore capable of persisting for a long time in the environment.
Management:
Hygiene and sanitation in a growth house.
Clean surrounding.
Benomyl at the rate of 0.95 g/m².
Carbendazim and Thiabendazole at the rate of 0.62 g/m².
Bacterial diseases:
Bacterial spot / brown blotch:Pseudomonas tolaasii
Pale yellow spots on the surface of the piles later turn yellow.
In severe cases, mushrooms are radially streaked.
Damage at storage and transit.
High humidity and watery conditions are favourable for disease.
Vector:Tyroglyphus mite.
Lesions on tissue that are pale yellow initially later become a golden yellow or rich chocolate brown.
The discolouration is superficial (not more than 2 to 3mm).
Management:
Hygiene and sanitation.
Low humidity.
Watering with an A1 50 ppm chlorine solution.
Viral diseases:
Virus (several)
Double-stranded RNA
Reduced cropping,
Bare patches on the beds,
Long-bent stalks with small caps,
Premature opening of mushrooms,
Stalks tapering towards the base of the stalk.
Management:
Farm hygiene.
Clean trays to prevent infection from old infected mycelia.
Maintaining 60°C temperature throughout the compost.
Advantages of Mushroom Farming:
Disadvantages of Mushroom Farming:
Conclusie:
The world mushroom industry has accelerated very rapidly in the last two decades by way of consisting of new types of mushrooms for commercial farming. Echter, mushroom as a vegetable has not located an ordinary area amongst Indian consumers. Despite a favourable agro-climate, an abundance of agricultural wastes, noticeably low-cost labour and wealthy fungal biodiversity, India has seen a lukewarm response in its growth. Momenteel, the whole mushroom manufacturing industry in India is around 0.13 million tonnes.
From 2010-2017, the mushroom industry in India has recorded a common increase charge of 4.3% per year. Of the total mushrooms produced, white button mushroom bills for 73%, observed through oyster mushroom (16%), paddy straw mushroom (7%) and milky mushroom (3%). Compared to other vegetables; The per capita consumption of mushrooms in India is low and information shows that it is much less than 100 grams per year.
In the 12 months 2016-2017, the Indian mushroom enterprise generated an income of Rs. 7282.26 lakhs by exporting 1054 quintals of white button mushroom in canned and frozen form. Considering the production figures, the demand for spawn in India is estimated to be around 8000-10000 tonnes per year. The majority of this business spawn is furnished to non-public producers and the contribution of public region corporations in spawn grants used to be constrained to only 10%. In dit artikel, we attempted to analyse the contemporary state of affairs of the mushroom industry with the assistance of AICRP community centres placed throughout the US and discuss the possibilities and challenges for the improvement of mushroom entrepreneurship in India.

Khaki Campbell Duck:Rise of the Khakis
Foto-essay:stadstuinen in Asheville
12 groenten die je in water kunt kweken

Wat zijn Black Cherry-bladluizen - Een gids voor het beheren van Black Cherry-bladluizen?
Marjolein in je kruidentuin planten en kweken?
Amerikaanse wijnhuizen proberen hybride druiven te verbeteren
Tilapia-kweek voor beginners (eenvoudige handleiding)
Sinaasappellandbouwtechnieken Teelt- en plantgids
Kun je knoflook direct na het oogsten eten?
Herfstoogst:appels plukken en bewaren voor de winter?